
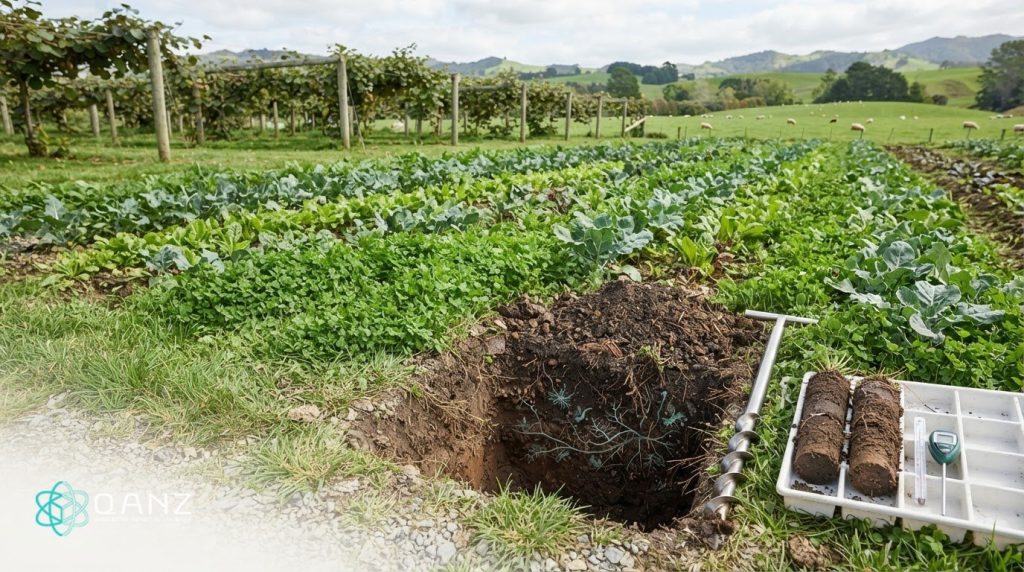
Stopping synthetic fertilisers is a transition, not a soil-restoration plan by itself. If you’re deciding what to do after stopping synthetic fertilisers, start by assessing soil fertility and biological activity, then match nutrient sources to your crop and soil needs. One staged approach is to reduce synthetic fertiliser to half the original amount in the first year, one fourth in the second year, and 25% in the third year before stopping in the fourth year.
It’s understandable to want a clear plan that supports crop growth while building soil health over time. This guide explains how to assess fertility, select organic nutrient sources and set practical goals for a gradual transition in New Zealand. It also covers nutrient release, soil biology and what to monitor as you adjust inputs, so you can plan around your farming system rather than follow a one-size-fits-all schedule.
Key Takeaways
- Begin with a clear picture of soil fertility and biological activity, then use those findings to guide nutrient decisions.
- Compare organic nutrient sources by their origin and release pattern, and consider how soil biology affects nutrient availability.
- Reduce synthetic fertiliser use in planned stages, adjusting the transition to your crops and farming system.
- Set short-term production priorities alongside longer-term soil health goals, and track changes as you go.
- Expect soil and crop responses to take time; monitor growth and soil conditions to inform your next steps.
Assessing soil fertility and biological activity
In New Zealand, include legumes such as clover alongside grasses or cereals in cover crops and rotations. Choose species to suit the paddock, season, soil drainage and following crop, then retain plant residues where practical.
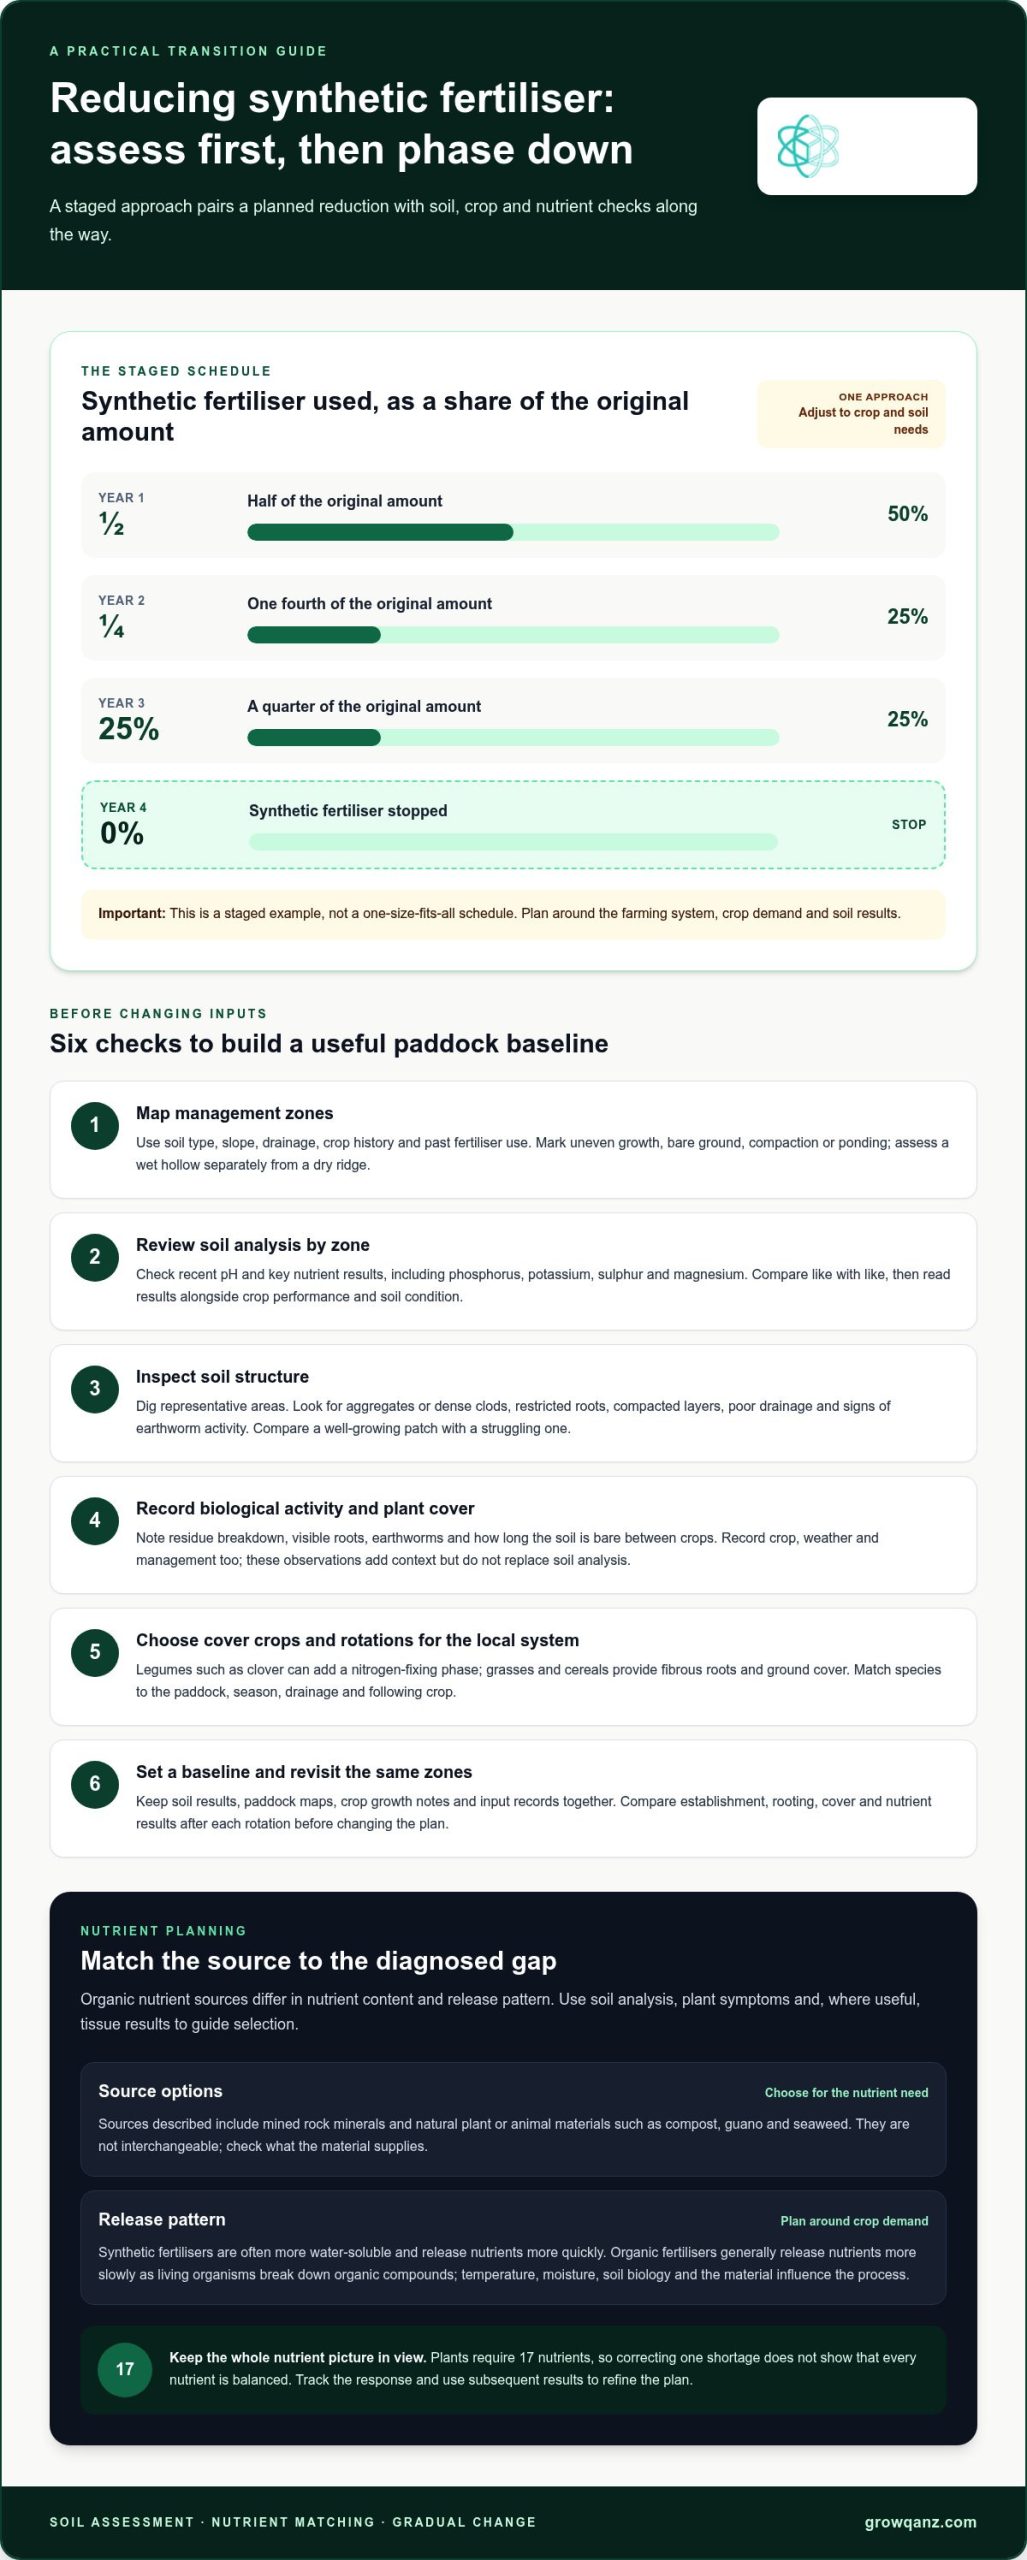
- Map the paddock before changing inputs. Divide it into management zones using soil type, slope, drainage, crop history and past fertiliser use. Note areas with uneven growth, bare ground, compaction or ponding. For example, a wet hollow and a dry ridge may need separate assessment. Keep these zones consistent when comparing observations, so one unusual area doesn’t distort decisions for the whole farm.
- Review soil analysis by zone. Use recent results for pH and key nutrients, including phosphorus, potassium, sulphur and magnesium. Compare like with like: the same paddock zone, sampling approach and timing make trends easier to interpret. A single nutrient result doesn’t describe overall fertility. Read it alongside crop performance and soil condition, then identify which nutrients may limit the next crop.
- Check soil structure in the field. Dig into representative areas and inspect whether soil breaks into aggregates or forms dense clods. Look for restricted roots, compacted layers, poor drainage and signs of earthworm activity. Compare a well-growing patch with a struggling patch in the same paddock. This contrast can help distinguish nutrient issues from physical constraints that limit root growth and water movement.
- Record biological activity and plant cover. Note residue breakdown, visible roots, earthworms and the duration of bare ground between crops. These observations don’t replace soil analysis, but they add context about living roots and organic material. Record the crop, weather and management alongside each observation. If soil life and mineral balance are neglected, regular nutrient applications may become more necessary to sustain plant growth.
- Choose cover crops and rotations for the local system. A clover or other legume can add a nitrogen-fixing phase to a rotation, while grasses and cereals provide fibrous roots and ground cover. Brassicas can add a different rooting pattern. Match the mix to the next crop, sowing window, drainage and grazing or termination plan; no single mix suits every New Zealand farm.
- Set a baseline and repeat observations. Keep soil results, paddock maps, crop growth notes and input records together. Revisit the same zones after each rotation and compare crop establishment, rooting, cover and nutrient results. If plants show weak growth, identify whether soil chemistry, compaction, moisture or disease pressure is the likely constraint before changing nutrient inputs. This makes the next fertility decision more specific.
Organic fertiliser sources and nutrient release
Use soil analysis, plant symptoms and, where useful, tissue results to identify deficiencies in nitrogen, phosphorus, potassium or trace elements. Address diagnosed gaps with a suitable organic nutrient source, considering its nutrient content and release pattern alongside crop needs.
- Match the source to the nutrient gap. Organic fertilisers can come from mined rock minerals and natural plant or animal materials, including compost, guano and seaweed. These sources differ in their nutrient content, so don’t treat them as interchangeable. For example, a product chosen to address phosphorus may not supply enough potassium or trace elements for the same crop.
- Read soil results alongside crop evidence. Check pH and nutrient results for the affected paddock, then compare them with crop growth and, where useful, plant tissue analysis. Nitrogen deficiency can show as weak growth or pale older leaves, while phosphorus shortage may affect establishment. Symptoms overlap, so use them as clues rather than proof; confirm the likely cause before applying a nutrient source.
- Select materials for the diagnosed deficiency. For phosphorus, consider a suitable mined rock mineral or a nutrient-rich organic material. For nitrogen, consider plant or animal-derived materials, including compost or guano. Potassium and trace-element needs require their own assessment because organic materials vary in composition. Choose according to analysis, crop demand and the intended application purpose.
- Account for slower nutrient release. Synthetic fertilisers are often more water-soluble and release nutrients more quickly. Organic fertilisers generally release nutrients more slowly as living organisms break down organic compounds and make minerals available. Temperature, moisture, soil biology and the material itself influence this process, so match application timing to crop demand and local conditions.
- Support the biological processes involved. Organic nutrient sources may need a biologically active soil environment to improve nutrient availability. Keep living roots in the rotation where practical, retain suitable crop residues and avoid management that leaves soil bare for long periods. For example, a cover crop can provide roots and plant material between cash crops, while a suitable rotation can diversify residue inputs.
- Track the response before adjusting again. Record the chosen material, paddock, crop stage and observed response. Compare subsequent soil or tissue results with the original deficiency, and note whether growth improves evenly across the affected area. Plants require 17 nutrients, so correcting one shortage doesn’t establish that every nutrient is balanced. Use the next results to refine the nutrient plan.
Gradually reducing synthetic fertiliser use
In New Zealand, adjust inputs according to crop demand and soil results rather than stopping all applications at once. If you’re deciding what to do after stopping synthetic fertilisers, a staged plan can help you manage production risks, deficiencies and nutrient losses.
Plan a gradual reduction
Set a paddock-level schedule and compare each season’s nutrient inputs with crop needs. One suggested approach reduces synthetic fertiliser to half the original amount in the first year, then one fourth in the second year. In the third year, continue at 25% of the original amount or stop; complete the transition by the fourth year. Treat this as a framework, not a universal prescription.
Watch for lower yields and deficiencies
Compare crop establishment, growth, forage quality and harvest results with the previous season. One farmer reported two years of low production and poor-quality forage after stopping synthetic fertilisers. Track symptoms alongside soil and tissue results, as nutrient shortages can lead to weak growth or uneven development. Identify the limiting nutrient before changing the plan, rather than automatically restoring a broad fertiliser blend.
Reduce nutrient runoff risks
Time applications to plant uptake, and avoid applying water-soluble fertiliser when heavy rain or saturated soil could carry nutrients away. Nitrogen not taken up by pasture plants can leach into groundwater and reach downstream waterways, including drinking-water sources. Where practical, keep the ground covered and review drainage, timing and placement in vulnerable paddocks. Record rainfall and crop condition when making each application decision.
- Replace nutrients with a measured plan. Use soil and crop results to determine which nutrients need replacing as synthetic inputs decline. Organic sources release nutrients more slowly, so factor in their breakdown and availability when planning timing. Repeatedly applying the same mineral fertiliser at high rates can overload soil with one nutrient while other deficiencies go undetected.
- Review the schedule after each harvest. Compare yield, forage quality, crop symptoms and nutrient records before making the next reduction. If production or quality falls, investigate whether nutrient supply, soil condition or crop timing played a part. At each review, use paddock records to decide what to do after stopping synthetic fertilisers, then adjust the next season’s plan to reflect farm performance.
Improving how you manage existing inputs can also support a gradual transition. More efficient use of fertiliser or farm effluent through fertigation or effluent injection may reduce the need for synthetic fertiliser. Consider whether these methods fit your nutrient plan, and assess them alongside soil and crop results rather than treating them as automatic substitutes. Aim to supply what crops need without unnecessary synthetic inputs.
The timetable need not be treated as a fixed deadline. The speaker says farmers may stop synthetic fertiliser use in the Third year or wait another year. A longer view is also possible: the page suggests that synthetic fertilisers and pesticides could be phased out over 20-30 years. This broader horizon can leave room for review and adjustment as farm performance is observed. Keep decisions tied to paddock results, and use the planned transition as a guide rather than forcing the same pace in every situation.
Short-term and long-term farming goals
Set production targets alongside soil-health goals, then review both against consistent paddock records. There is no fixed timetable for recovery: it depends on starting soil conditions, crop demand, nutrient replacement, management and seasonal growing conditions.
Set short-term farming goals
Set practical targets for the next crop or grazing season, such as uniform establishment, reliable feed supply or fewer visibly stressed plants. Record a starting point for each paddock and define success in observable terms. For a vegetable crop, that could mean even emergence across a bed; for pasture, steady feed availability through the planned grazing rotation. Keep targets realistic for the season.
Track soil biology and crop yield recovery
Track change through repeated observations rather than expecting soil and production to recover at the same time. At consistent points in the rotation, record root presence, residue breakdown, ground cover, crop development and harvest quality. Soil organisms respond to available plant material, moisture and soil conditions, while yields also depend on crop choice and weather. Compare similar paddocks and seasons before drawing conclusions.
- Separate immediate measures from long-term indicators. Check crop establishment and visible stress during growth, then assess harvest quality and production records later. Observe soil structure and biological activity separately. A well-established crop does not necessarily mean longer-term soil goals have been met, so track each measure on its own.
- Choose goals for your farm system. A vineyard might monitor vine vigour and fruit consistency, while a vegetable grower might focus on bed preparation and crop uniformity. Select indicators that reflect your operation’s priorities and can be recorded consistently. Avoid adopting targets designed for a different crop, soil type or production system.
- Review results at useful decision points. Compare records after harvest, before sowing the next crop and during rotation changes. If a target is missed, identify the paddock and growth stage affected, then consider soil condition, crop demand and nutrient timing. This turns a broad concern into a specific management question for the next planning round.
- Maintain a longer-term direction. Track core soil and production indicators consistently across rotations, while adjusting management for seasonal conditions. Set goals for ground cover, crop performance and soil condition that you can assess over time. Clear records help distinguish gradual change from seasonal variation and support informed decisions as the farming system evolves.
Longer-term goals can include recording how a chosen system performs under pressure, without treating one farm’s experience as a forecast for every paddock. In April 2021, Sri Lanka’s President Gotabaya Rajapaksa announced that the country would allow only organic farming and ban inorganic fertilisers and agrochemical-based fertilisers. Note the policy context when reviewing farm decisions, while keeping local targets grounded in the enterprise and its conditions.
One respondent reported that their farm had not lost crops to pest attack during their experience of organic farming. Record such outcomes alongside crop and soil observations, and consider how they relate to management, season and starting conditions. This helps distinguish an individual result from a dependable pattern and refine goals as evidence accumulates. Keep measures consistent so you can review changes in production and soil condition over time.
What happens to soil and crops after stopping synthetic fertilisers?
- Expect nutrient supply to change, not the soil to reset. Stopping synthetic fertilisers removes one input, but nutrients already in the soil, residues and organic material remain. The effect depends on past applications, crop removal, soil reserves and nutrients available from other sources. A paddock with adequate reserves may respond differently from one where crops have relied heavily on regular nutrient applications.
- Watch early crop growth closely. Synthetic fertilisers are manufactured, purified compounds that typically contain high percentages of specific elements. They can supply nutrients more directly than they correct soil nutrient levels. After stopping, crops may grow more slowly or develop unevenly if available nutrients do not meet demand. Compare affected areas with better-growing parts of the same paddock, and record crop stage and visible symptoms.
- Distinguish temporary nutrient stress from persistent soil constraints. Pale crops or poor establishment can reflect nutrient supply, but drainage, compaction, pH or root health may also be factors. Check whether symptoms follow soil type, slope or wet patches. For example, weak growth confined to a compacted headland points to a different constraint than similar symptoms across a paddock. Consider soil and crop evidence together before changing inputs.
- Allow biological nutrient cycling to develop. Organic materials release nutrients as living organisms break down organic compounds. Availability depends on the material and soil conditions, including moisture and biological activity. During the transition, nutrient release may not match crop demand as closely as a readily soluble input. Record organic inputs and crop responses to identify where timing or nutrient balance may need adjustment.
- Interpret yield changes across seasons. One harvest cannot show whether farm fertility is improving or declining. Compare yield or forage quality with paddock history, nutrient inputs and weather. A short-term production dip may signal a mismatch between crop demand and nutrient release; repeated declines call for a closer review of nutrient supply and soil constraints. Don’t assume every yield change has the same cause.
- Use long-term evidence carefully. DairyNZ scientists published a 10-year study on farming without synthetic nitrogen fertiliser. That study period gives a New Zealand reference point for examining change over time, but it doesn’t set a universal recovery timetable for every crop or farm. Soil type, rotation, climate, previous management and nutrient replacement all influence how soil and crops respond.
- Keep monitoring after the final application. Continue comparing soil results, crop growth, residue breakdown and production records across rotations. If a deficiency appears, identify the nutrient and affected area before choosing a response. Building balanced, healthy soil takes time, so rely on repeated paddock observations rather than expecting immediate changes in soil biology or crop performance.
GrowQanz: Quantum Organic-Total®
Quantum Organic-Total® is a microbial agricultural input offered by GrowQanz for crop and soil programmes. It may suit growers considering biological inputs as part of a wider fertility plan. Use it alongside nutrient management, soil assessment and crop monitoring, not as a substitute for diagnosing deficiencies or planning nutrient replacement.
To discuss how a biological input may fit your crop and growing programme, contact GrowQanz about soil care.
Make your next soil decision deliberate
Turn your transition into a clear farm-management direction by deciding which outcomes matter most to your operation, such as dependable crop establishment, resilient pasture or healthier soil structure. Make each input decision serve those priorities. This keeps the question of what to do after stopping synthetic fertilisers connected to your land’s needs, rather than a fixed recipe that may not suit every paddock.
Biological inputs may have a place in your plan alongside nutrient management and careful observation. QANZ supplies Quantum agricultural biological products to growers in New Zealand and Australia, and offers product and application support for crop programmes. Discuss how Quantum products may fit your growing programme, without treating any product as a substitute for sound fertility planning.
Contact QANZ about soil care and take the next step towards a considered plan for your farm.
Frequently Asked Questions
How much compost, manure, lime, or other amendments should be applied after stopping synthetic fertilisers?
Base application rates on soil analysis, amendment nutrient content and crop requirements, not a standard rate. With compost or manure, account for nutrient contributions as well as organic matter, and avoid applying more nutrients than the crop can use. Apply lime to address measured soil acidity, following the soil recommendation and the product’s neutralising value. Record the material, rate, paddock and application date.
Which soil tests should be done before stopping synthetic fertilisers in NZ, and what do they cost?
Review recent soil results by paddock zone for pH, phosphorus, potassium, sulphur and magnesium. Plant tissue analysis can also help where useful. The material gives no test costs.
What are the rules for using manure, compost, and organic fertilisers on NZ farms and gardens?
Use soil and crop results to identify nutrient needs, then choose compost or another organic source to suit the deficiency, crop demand and purpose. Organic fertilisers release nutrients more slowly, so factor in breakdown and soil conditions when planning application timing.
Disclaimer
Important: This article provides general agricultural information only. Product performance can vary according to crop, soil, climate, management practices and application conditions. Trial or research results discussed may have been obtained under specific conditions and should not be interpreted as a guarantee of equivalent results. Always follow current product directions and confirm suitability for your crop, growing system and organic certification requirements. Contact QANZ for current product and application information.
